Showing posts with label recipes. Show all posts

Sweet Tooth Saturday: Mint Oreo Cupcake Recipe


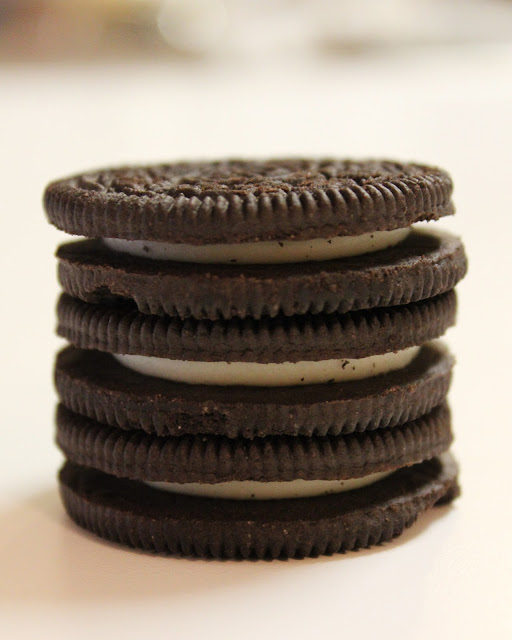
Do you remember when I told you I have a sweet tooth?!  Well, Mr. Sharkey also has quite the sweet tooth himself and because his birthday was this past week, I made a new recipe with his favorite flavor - mint oreos.   You might even notice that most of my other recipe posts on here include oreos; they are a favorite of ours and it's their 100th birth year.  I'm just helping them celebrate that's all...

Because these turned out pretty amazing, I am sharing the recipe with you today for another Sweet Tooth Saturday post!


Ingredients:
1 pack mint oreos
1 box white cake mix (+ ingredients needed for cake mix listed on the box)
1 can vanilla frosting
cupcake liners
**I am sure that homemade cake batter and frosting would taste better, but sometimes I just need to keep things simple.  I like adding ingredients to an already prepared batter, but if you would like to create these from scratch, just follow the oreo steps that would be added to your own recipe.**

1) Line your cupcake pan with paper or foil liners.  Twist open the oreos and place the cream side up. {save the top cookie pieces for the next step}  You will be pouring the batter over the oreo icing.


2) Prepare your cake mix as directed on the box.  Mix in the top cookie pieces left over from step one.  Mix well.  Next, take full oreos and break into big chunks and add it to the batter.  Mix slowly with a spatula so you do not break them into small pieces.  You want big pieces of oreo in the cupcake!  Trust me...


3) Fill cupcake liners 3/4 full.


4)  Puree 4-5 full oreos.  This will be added to the icing.


5) Mix the oreo puree in to the vanilla icing.


6)  Pipe the icing on the cupcake and you're done!


7) Eat up!  I recommend piping the icing on the cupcake while it is still a little warm and enjoy with a glass of milk.


Enjoy.
Have a great weekend!

Oreo BonBon Recipe

Today I am sharing another fantastic Oreo recipe with you all!


A few years ago, my friend Gretchen introduced me to the wonderful world of Oreo bonbons!  What is an Oreo bonbon?!  Well, it is basically a truffle-like Oreo fudgey {not sure that's a real word} center that is dipped in chocolate.  Gretchen heard of the recipe from her sister-in-law, that heard it from who knows where.  I am just thankful someone shared it with me, so now I am sharing it with you!


This recipe is really easy and will be the perfect thing to take to your holiday parties!

Ingredients:
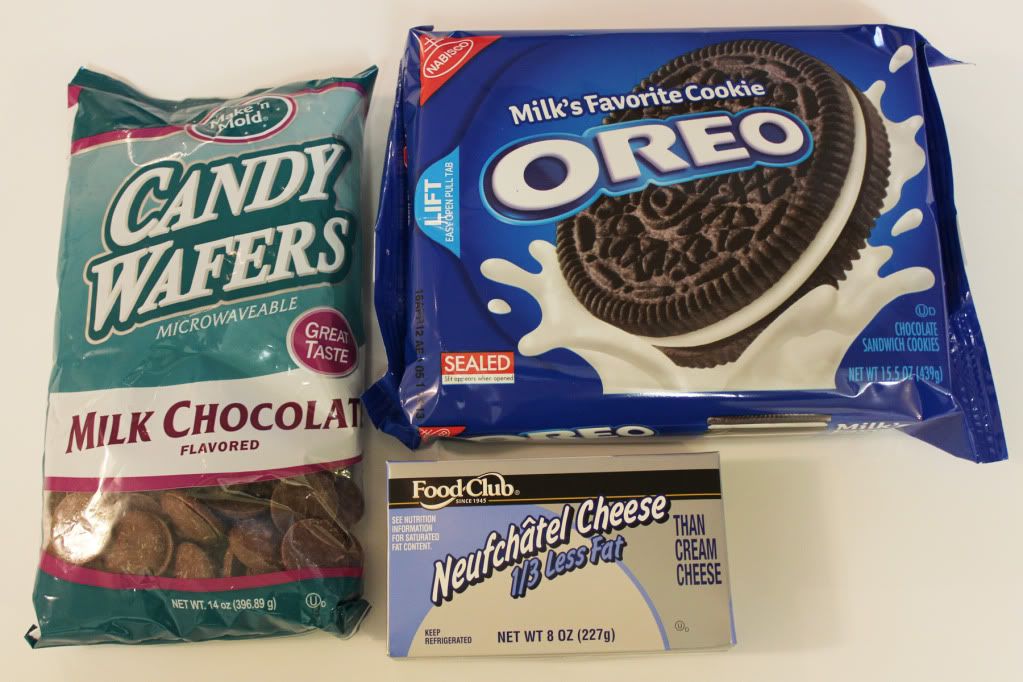
1 package of regular oreos
1 block of 1/3 reduced fat cream cheese (not sure why, but the 1/3 fat works best)
Milk chocolate or chocolate almond bark for melting and dipping.


Photobucket
*I bought generic brand cream cheese and melting chocolate since I am doing lots of baking this time of year and wanted to not go crazy with the grocery bill.  I was a little nervous changing things up, but they turned out just amazing as they always do.  So don't worry about buying a specific brand of chocolate or cream cheese.  If I wouldn't have found Oreos on sale at Wal-Mart, I would have tried the off brand as well.


1) Take your package of Oreos, and place the entire cookie in a food processor.  I use a little kitchen aid appliance that purees the Oreos down into tiny little crumbs.


2)  Take your block of cream cheese and place it in the bowl with the cookie puree.
*If you are using a double stuff Oreo, maybe cut down the block of cream cheese a tiny bit.


3)  Use your hands and mix the cream cheese in with the Oreos.  This part is kinda messy, but is the best way to really get everything mixed really well.  Once combined, form the mixture into little balls and place on a waxed cookie sheet.


4)  Once all of the cookie mixture has been formed into little balls, place the cookie sheet in the freezer to cool them quickly, about 10 minutes.  This will help the chocolate coating to stick and cool to the bonbon quicker.


5)  Now it's time to dip them in chocolate!  Take your chocolate pieces and melt them down according the the directions on the bag.  Once the chocolate is melted, I like to pour it into a small sauce pot on the stove with a very low temperature to keep the chocolate warm.  For dipping into the chocolate, I use a special whisk that I purchased at the Smuckers store in Orrville, OH.  You can also use toothpicks or another method that works well for you.


 6)  Place the bonbon back on the cookie sheet while it cools.  Finish dipping every bonbon in chocolate and then you are done!  Keep the bonbons stored in the refrigerator or keep them in the freezer until your party so they will be colder longer and can sit out on a table for an hour or two.


 *optional steps below:


7)  Purchase colored melting chips (usually it is vanilla flavored) at your local craft store in the baking section.  Melt it according to the package.  Place the melted vanilla chips in a bag and clip a very small opening in the corner of the bag to decorate the bonbons.


*Want more suggestions?!  Try using mint, peanut butter, all chocolate or other flavored Oreos to give your bonbons a twist!  I will let you in on a little secret, mint oreos with a dark chocolate outer layer is so delicious and perfect for winter!  My next combination I want to try that I haven't yet; peanut butter Oreos with a white chocolate coating.  


Have fun experimenting with your Oreo bonbons!  I am certain they will be a big hit at your next get-together.


Oreo Stuffed Cookies

Now that it is Christmas time, I have several reasons to bake for parties and get-togethers.  Thanks to Pinterest, new recipes are easier than ever to find. I recently pinned this cookie that made my eyes light up.  So, with the help of my friend, we decided to give it a try yesterday; with a twist.

Oreo Stuffed Cookies.  Quite possibly the best cookie I have ever made.

If you like chocolate, cookies, oreos, eating, sugar comas or all the above, give this recipe a try.

You will need:
2 pouches of cookie mix + ingredients listed on the back of the package (this made about 21 Oreo stuffed cookies total)
1 bag of double stuff Oreos
Cooking utensils, cooling rack, baking sheets, oven, etc.


First:
The original recipe called for homemade cookie dough.  I am too impatient to make homemade cookie dough, so we bought Betty Crocker pouch cookie mix.  We tried two different kinds, double chocolate chunk and regular chocolate chip cookie dough.


Second:
Make the cookie dough as recommended on the back of the pouch.  Once the cookie dough is prepared, try your best not to eat the dough.  This is always the hardest part for me, but you need as much dough as possible for this recipe!  

Grab a spoon and start piling on the cookie dough; enough to completely cover the Oreo cookie.


Third:
Bake the cookies on a nonstick cookie sheet.  We baked ours for 9 minutes.  Once you pull the cookies out of the oven, they will look kind of weird.  We thought they were ruined!  So we grabbed two spatulas and started to "smoosh" the chocolate chip cookie in toward the Oreo.  Ta-da!  It saved the day...


Last:
Cut two cookies in half, one of each flavor, and vote on which is the best.  We decided that the double chocolate chunk Oreo stuffed cookies were the best.  It sounds like too much chocolate, but oh.my.goodness. they are amazing.  Very fudgey, and the "stuff" in the double stuffed Oreos oozes out of the cookie when served warm.


So if you are looking for a new cookie recipe to take to your next Christmas party, you miiiight want to bake these!

Five Favorites: New fall recipes to try

Now that fall is officially here, I am so excited to bake and eat anything apple, cinnamon, pumpkin and streusel.  I have two recipes that I love baking, but thought I should spice up my recipe box this year and try some new treats.  If you are reading this husband, don't worry, I will still make your favorite apple crisp and apple cake at some point this season ;)

All new recipes courtesy of the wonderful, awesome and always addicting pinterest.

Before and After: Homemade Raspberry Jam Recipe

Photobucket
photo source
Photobucket


Photobucket


Things you will need:

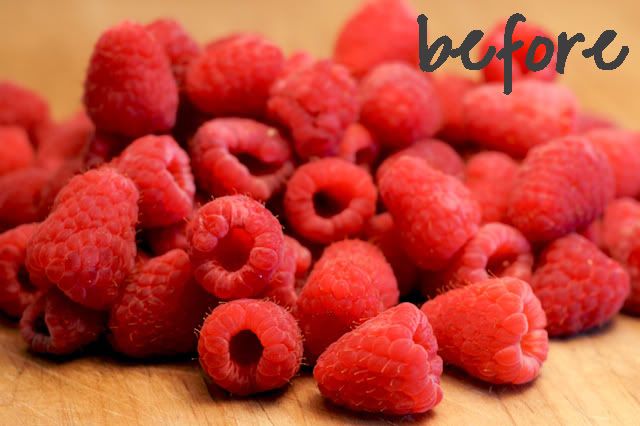
Lots of raspberries
Lots of sugar
Butter
A few boxes of pectin
Jars with sealable lids 
Foil
Small pot
Medium pot
Large pot
Two pairs of tongs
Pot holder
Wooden spoon
Funnel
Strainer
Large bowls
Measuring cup
Clean up supplies


Before you start:

Wash all jars and lids.  The best way is to wash the jars in the dishwasher and keep the door closed after they are clean to keep the heat in.  You will transfer the hot jars into a medium pot of really hot water to keep them sterile throughout the jamming process.


After you wash, puree and sift the berries [to get rid of all the little seeds] you are ready to start jamming!

Measure 5 cups of berries and pour into small pot.  Stir in one packet of pectin and bring to boil.  Once the berries are boiling, pour into large pot resting on a different stove burner.
Photobucket
Photobucket

Add your butter and sugar...Everything tastes better with butter and sugar ;)
Photobucket

Bring to a hard rolling boil for one minute.
Photobucket

Using tongs, remove the glass jars from the boiling water, dump any excess water, and place on the counter next to large pot.
Photobucket

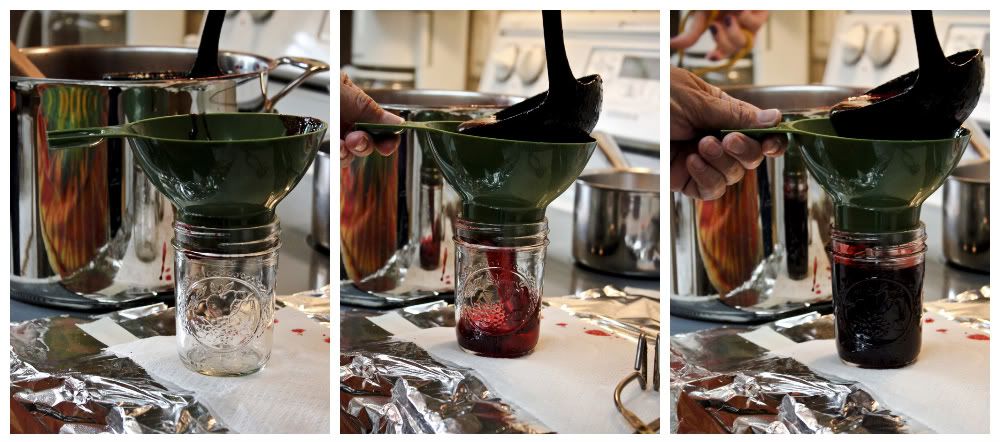
Using a funnel and ladle, pour raspberry goodness into the jars.
Photobucket

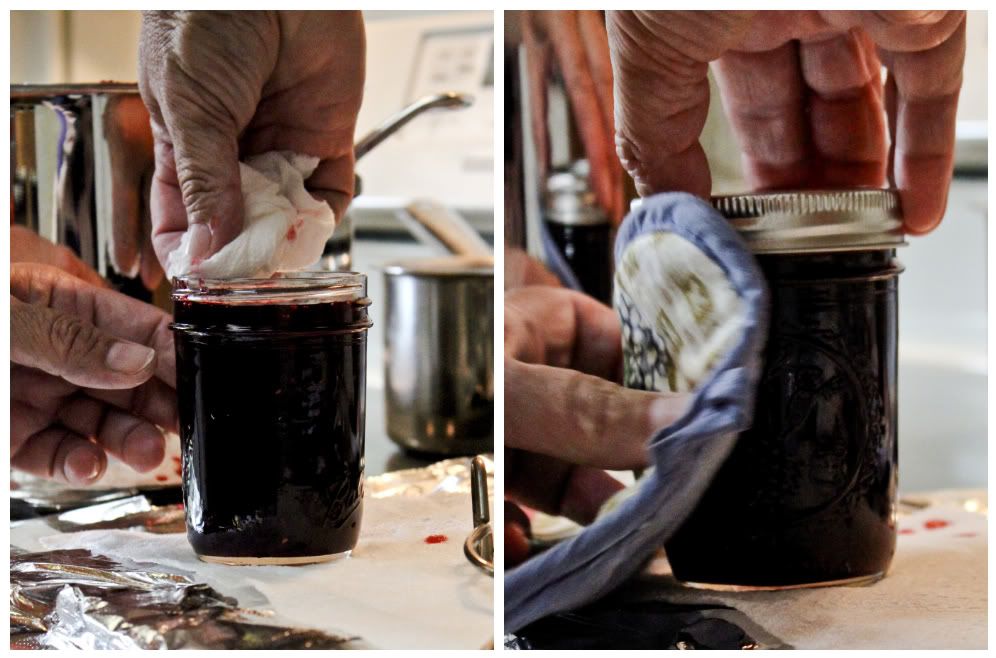
*Very important step* Use a paper towel to remove any liquid from the rim of the jar.  This keeps the jar sterile and creates a nice suction on lid.
Photobucket

Once you screw the lid on, place on a table and listen for all the lids to pop!  That sounds lets you know they are good to go!  If your jars are not sealed, you will need to eat within the week or two.  After your jars have cooled and the lids have popped, you can gather all your favorite crafting supplies and decorate your jars so they are ready for gifting.  These little jam jars are *perfect* for Christmas stockings, get-togethers and wedding favors!

A photo from Gretchen's wedding.  200+ little jam jars with seating information for the guests.


Thanks to Marianne and Gretchen for always making the most delicious raspberry goodies and inviting me to jam with you at your lovely home.  It is always a fun time :)  

CousCous Ca Choo

Between Justin and I, we are always looking for new recipes.  Justin's dream would be to open a restaurant and take a few cooking classes.  Let me tell you, he is a great cook!  Not only are his recipes so tasty, but he also really enjoys the process.  When Justin is in the kitchen, he is calm, focused and acts like a pro.  When I cook, I feel like I am running around frantic and ingredients are flying all over the place!


One of our favorite recipes was shared a couple years ago from a great friend, Abbey, and is a mexican style couscous.  It is one of our favorites!

-Couscous (pronounced "koos-koos"), a staple of North African cooking, is now widely available in packaged form in most supermarkets. Couscous is granules of semolina made from durum wheat, the ideal pasta wheat, which are precooked and then dried.

Couscous is so easy to make (bring water, couscous and olive oil to a boil, remove from heat and let sit 5 min.) and then you basically add anything you want!  You can add stew on top of the couscous, you can prepare it mediterranean style with olives, tomatoes and feta cheese, or you can make it mexican style!  Check out the recipe below!  I would love to hear how your couscous turns out or your favorite way to eat couscous!

Mexican Style Couscous:

Ingredients:

1 box couscous (garlic and herb is what we used to buy, but our new grocery store doesn't carry it.  Abbey uses parmesan and hers is fantastic!)
red pepper
orange pepper
red onion
tomato
corn (frozen corn is recommended)
cilantro
lime
salt
pepper
olive oil


1.  cook couscous as directed on the box. (bring water, seasoning and olive oil to boil.  stir in couscous, cover and remove from heat.  let sit 5 minutes.)

2.  cook frozen corn as directed on bag (half bag frozen corn in pot over high heat with 1/4 cup water.  bring to boil, cover and reduce heat to medium.  cook 4-5minutes)

3.  wash and cut veggies (everything is to taste.  I usually use half of each vegetable)

4.  add all vegetables to the couscous in bowl.  

5.  add lime juice (1/2 - 1 full small lime)

6.  add salt and pepper to taste

7.  chill in fridge
enjoy :)
Wash and cut your veggies...or have your hubby do it for you ;)

Look at all the pretty colors!

I always add my corn to my couscous first.  No reason to it.  I just do.

Lovely!  A beautiful, healthy and addicting snack or side.

If you are really feeling fancy, have your husband make it look structural with blue corn chips.


What is your favorite recipe?!


This post is linked with:
http://www.thewiegands.com/search/label/recipes