
In a few weeks, I will be participating in JessicaNDesigns handmade gift guide on her blog and decided to make a new blog button to promote my shop.


While making new blog buttons, I decided to share with you a little tutorial that can help you not only make your own blog buttons, but also fade an image and layer text.
Are you ready?! Here we go!
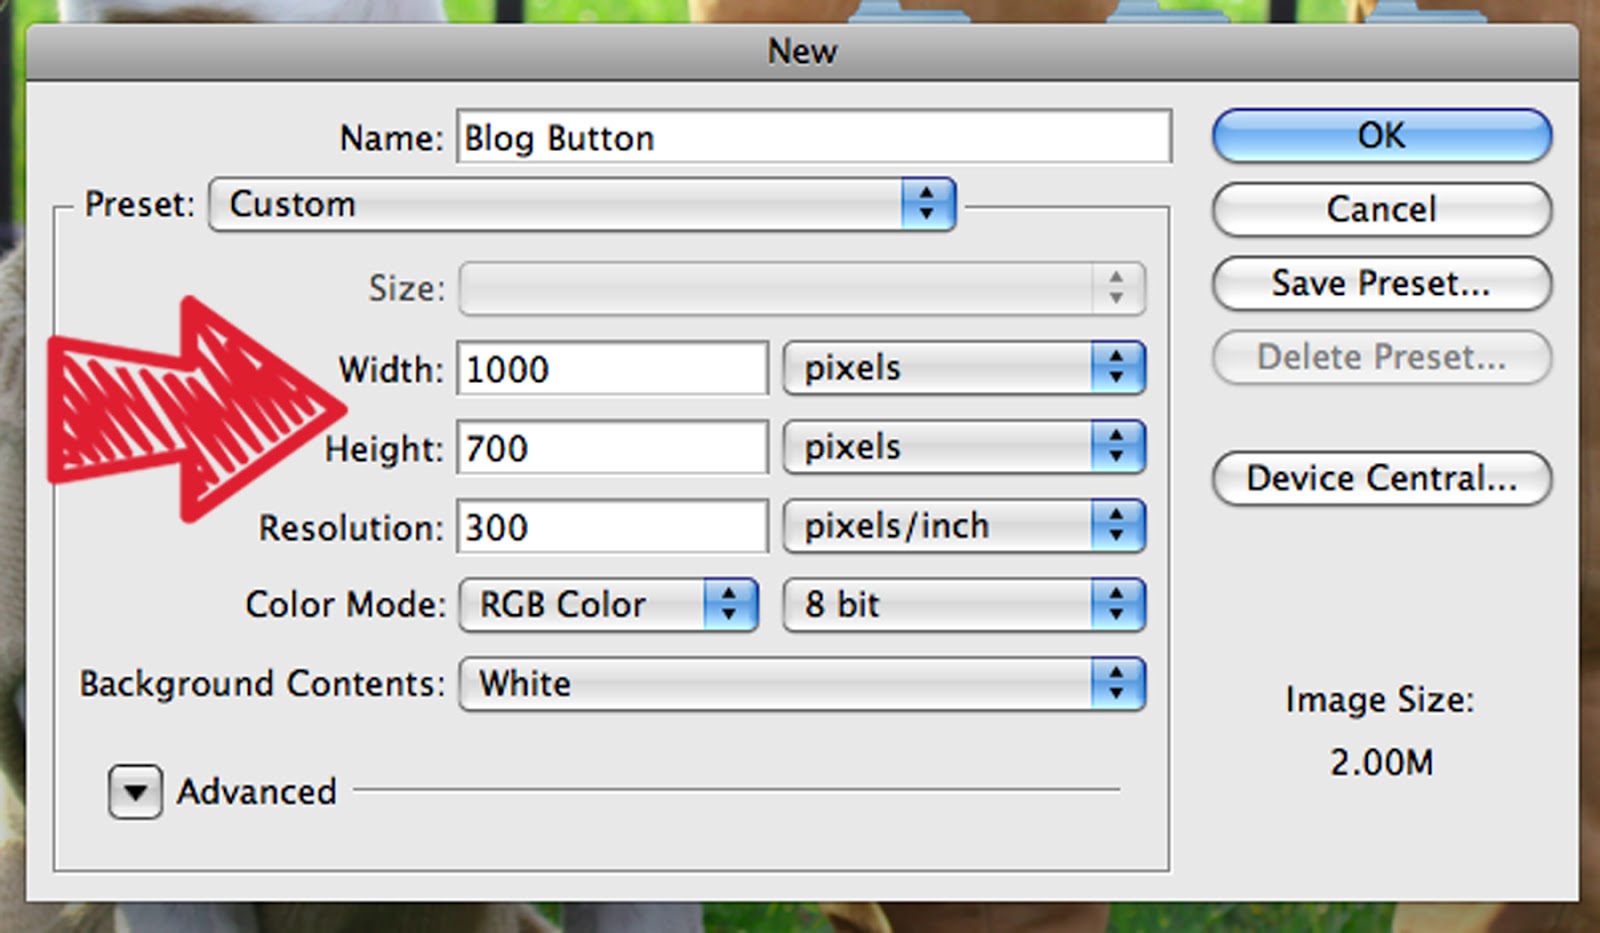
1.) Open Photoshop {naturally} and go to file --> new and type in a name, then decide what size you want the image to be. My title is blog button and the size needed to be 250 x 175 for Jessica's site. I like to work with bigger images first, so I made mine 4 times bigger than that and started with 1000 pixels by 700 pixels, which I will size down to 250 x 175 when I am done. Hit OK.
2.) Next, upload any pictures you would like to use in your blog button. I wanted to include my new chevron tee. Go to file --> open --> select photo --> open.
The first thing I do when I open an image is to make a duplicate copy of the locked background image. This way you can manipulate the image and have a copy to refer back to. If the layer is locked, you can't really do much. Click on the layer that says background, hold it down and drag it to the new layer icon at the bottom of the layer palette. The new layer icon is second in from the right.

Now you can see that you have two layers. You can leave them both visible, or hide the locked one and just view and work with the copy.
3.) Depending on your image, you might have to resize it. My images are huge file sizes, so I resized my picture before dragging it onto the original canvas I created titled Blog Button.
To resize, go to edit --> transform --> scale and a box will appear around the entire image. Hold down shift to keep the same proportions and adjust the picture size.
You are now ready to drag it into the original canvas you just created with the correct pixel dimensions!
4.) Using your pointer tool in the top right of your toolbar, hold down on the image and simply drag it to the plain white canvas behind the current image, titled blog button. Once on the new canvas, position the image to your liking. I decided to place mine on the far left of the canvas because I am looking to the right.

5.) Create a new layer. Click on the same icon second from the right on the layers palette that we used in step 3. Drag the layer down one to position it just below the background image layer (the one with your photo).
In this layer, you will fill it with a color that is similar to the rest of your image. Change your foreground color and then use your paint bucket tool to fill in the color on that layer.

I chose a light tan color that was a similar shade to the book pages.

6.) Apply a layer mask to layer with your photo. To do this, click on the icon in the layer palette 3rd in from the left that looks like a grey square with a little white circle in the center. Once you click on it, a white box will appear on the picture layer.

7.) Select the gradient tool on your left toolbar. Make sure the gradient setting is foreground to transparent. With the mask layer selected, you are ready to apply a gradient to the image that will fade the color layer into the picture.

*hint - if you hold down shift while drawing the gradient line, it will create a perfectly straight line for you.
Let go of the mouse, and..... ta-da!
Your picture fades into the background color!

You can play around with the length of the gradient to add more or less of a faded look.
8.) Now it's time to add extras to your button design! I added text and a dotted line to my button. To apply text, click on the large T on the left toolbar and select a fun font and color on the top toolbar. I made my text right justified because I thought it was the most visually appealing.


To make my line dotted, I used the eraser tool and and just erased pieces of the line to give it a natural dotted look.
9.) Once your image is awesome and you are done adding anything extra, you are ready to size it down. Remember how my image needed to be 250 x 175 pixels but I made it 1000 x 700 pixels to work on a larger scale? Well, it's time to scale it back down. Go to image --> image size and then change the 1000 pixels to 250 and the 700 pixels to 175.
So there you are friends. A tutorial on how to create your own awesome blog button design!


3 friendly comments:
love this girlie!!!! you're so great at tutorials and i really really love your shirt!!!!
@stephanie
Thanks steph! I'm thinking of making this tee in more color options because of the response. I really like it too :)
thank you for this!
Post a Comment